

Inside this Article:
I. Introduction
Ensuring your dash cam is properly installed is crucial to capturing high-quality footage that can be used as evidence in the event of an accident or incident on the road. With the growing popularity of dash cams, it's important to understand the key steps involved in fitting one correctly to your vehicle. In this comprehensive guide, we'll cover 7 must-know tips to help you install your dash cam with confidence and maximize its effectiveness.
II. Choosing the Right Mounting Location
The first step in properly installing a dash cam is selecting the right mounting location. This decision will impact the camera's field of view, stability, and overall performance. When choosing a spot, consider factors such as the driver's line of sight, potential obstructions, and the overall aesthetics of the installation.
One of the most popular mounting locations is the windshield, as it provides an unobstructed view of the road ahead. However, you'll need to ensure the camera doesn't interfere with the driver's vision or create any blind spots. Alternatively, you may opt to mount the dash cam on the dashboard, which can offer a more discreet and integrated installation, but may result in a slightly narrower field of view.
To determine the optimal mounting location, consider taking a test drive and evaluating different positions to find the sweet spot that captures the entire road ahead without causing any distractions.
III. Concealing the Dash Cam Wiring
Neatly concealing the power cable is essential for a professional-looking and safe dash cam installation. Exposed wiring can not only be an eyesore, but it can also create a potential hazard by interfering with the driver's controls or causing a tripping hazard.
When routing the cable, try to tuck it along the headliner, down the A-pillar, and under the dashboard to keep it out of sight. You can use a combination of adhesive clips, wire ties, and even plastic trim pieces to secure the cable and ensure a clean, seamless installation. Avoid running the cable across the dashboard or in a way that could potentially obstruct the driver's view.
Additionally, be mindful of any potential chafing or wear spots where the cable may rub against sharp edges or moving parts. Taking the time to properly conceal the wiring will not only enhance the aesthetic of your dash cam setup but also help prevent any future issues or damage to the installation.

IV. Securing the Dash Cam Firmly
A stable and secure mounting is essential for capturing clear, steady footage. The last thing you want is for your dash cam to vibrate, shake, or become dislodged while driving, as this can lead to blurry or unusable recordings.
When it comes to mounting hardware, choose a solution that is specifically designed for your dash cam model and provides a reliable, sturdy attachment. This may include suction cups, adhesive pads, or even permanent mounting brackets. Avoid using generic or improvised solutions, as they may not provide the necessary level of stability.
Once you've selected the appropriate mounting hardware, take the time to properly secure the dash cam in place. Ensure the attachment is level, tight, and able to withstand the vibrations and movements of your vehicle. Regularly check the mounting to make sure it hasn't become loose over time, and make any necessary adjustments to maintain a secure fit.
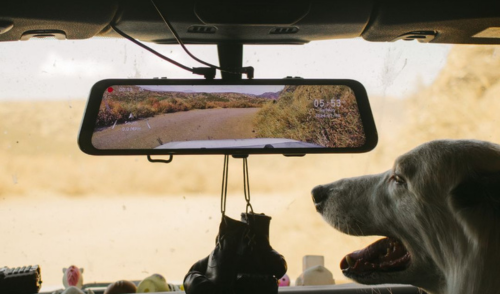
V. Adjusting the Camera Angle
Obtaining the optimal camera angle is crucial for capturing high-quality footage that can provide valuable evidence in the event of an incident. The angle of the dash cam should be carefully adjusted to ensure it is facing forward and slightly downward, providing a clear view of the road ahead and the vehicles around you.
Start by positioning the dash cam in a way that aligns with your natural line of sight while driving. This will help ensure the camera is capturing the same perspective you have while behind the wheel. Then, make fine-tuned adjustments to the tilt and rotation of the camera until you're satisfied with the framing and coverage.
It's important to remember that the camera angle can have a significant impact on the quality and usefulness of your recordings. An improperly angled dash cam may result in footage that is too high, too low, or skewed, making it difficult to clearly identify details in the event of an incident.
VI. Powering the Dash Cam
Reliable and consistent power supply is essential for your dash cam to function properly and capture footage continuously. There are several power options to consider when installing your dash cam, each with its own advantages and disadvantages.
One common solution is to use a hardwired connection, where the dash cam is directly wired into your vehicle's electrical system. This ensures a constant power supply and eliminates the need to worry about a depleted battery. However, hardwiring can be more complex and may require professional installation.
Alternatively, you can use a power adapter that plugs into your vehicle's 12V or USB port. This is a simpler and more straightforward option, but it does come with the risk of the dash cam draining your car's battery if left running for an extended period when the engine is off.
Regardless of the power option you choose, it's crucial to ensure that your dash cam is not consuming too much power and causing your vehicle's battery to drain. Consider features like automatic shutdown or motion-activated recording to help conserve battery life and prevent any unexpected power issues.

VII. Maintaining the Dash Cam
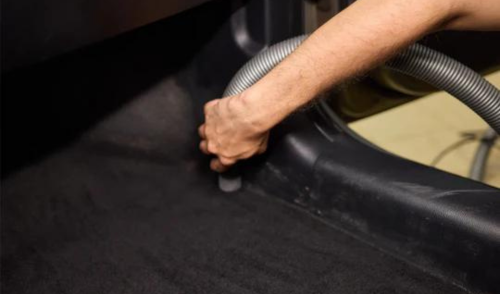
Proper maintenance and care are essential to ensuring your dash cam continues to function optimally and capture high-quality footage over time. One of the most important tasks is keeping the lens clean and free of any obstructions or smudges.
Use a microfiber cloth or lens cleaning solution to gently wipe the dash cam's lens on a regular basis. Avoid using harsh chemicals or abrasive materials, as they can damage the lens and impair the camera's performance.
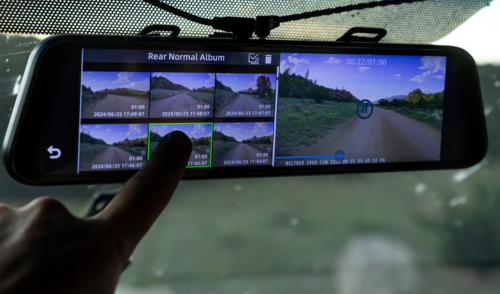
Additionally, be mindful of any issues that may arise after the initial installation, such as loosening mounts, disconnected cables, or changes in the camera's field of view. Regularly inspect your dash cam setup and make any necessary adjustments to maintain a secure and reliable installation.
If you notice persistent problems or find that the dash cam's positioning or functionality no longer meets your needs, it may be time to consider relocating or reinstalling the device. Doing so can help ensure your dash cam continues to provide the protection and evidence you need.
VIII. Conclusion
By following these 7 must-know tips for properly installing a dash cam, you can be confident that your device will be securely mounted, discreetly integrated, and capturing high-quality footage to protect you on the road. Remember to carefully consider the mounting location, conceal the wiring, ensure a stable and secure fit, adjust the camera angle, choose the right power option, and maintain the equipment over time.
With the right approach, your dash cam installation will not only be functional but also visually appealing and seamlessly integrated into your vehicle. Take the time to follow these guidelines, and you'll be well on your way to enjoying the peace of mind and valuable documentation that a properly installed dash cam can provide.
Also, if you've decided to install a high-quality dash cam, we recommend visiting your nearest Wolfbox authorized dealer. They provide professional installation services to ensure your dash cam is set up properly and able to perform at its full potential. With years of experience, the Wolfbox dealers can offer you a satisfactory installation experience. You can visit the following website to find the nearest dealer to you. https://uk.wolfbox.com/pages/certificated-distributor
FAQs
Q1: How do I choose the best location to install my dash cam?
A1: When selecting a location for your dash cam, consider the driver's line of sight, potential obstructions, and overall aesthetics. Common positions include the windshield or dashboard, but ensure it doesn't obstruct the driver's view or create blind spots.
Q2: How can I hide the power cable of my dash cam?
A2: Hide the power cable within the headliner, along the A-pillar, or under the dashboard using adhesive clips, wire harnesses, or plastic trim.
Q3: What are the recommended mounting options for a dash cam?
A3: Recommended mounting options for dash cams include suction cup mounts, adhesive pads, or permanent installation brackets, depending on the model and design of your dash cam.
Q4: How do I connect my dash cam to the vehicle's power source?
A4: Dash cams can typically be connected to the vehicle's power source using a cigarette lighter adapter or USB port. Ensure the power source provides sufficient power and consider using a dedicated power adapter if needed.
Q5: How do I adjust the camera angle of my dash cam?
A5: To adjust the camera angle of your dash cam, refer to the user manual for specific instructions. It may involve rotating, tilting, or adjusting the lens to ensure it captures the desired field of view without obstruction.
Leave a comment
This site is protected by hCaptcha and the hCaptcha Privacy Policy and Terms of Service apply.